Comment fonctionne la règle des tiers en photos ou vidéos ?
Ils arrivent extrêmement souvent qu’on me pose cette question. Il est très important de bien comprendre la règle des tiers pour donner une émotion à vos images, il n’est pas nécessaire d’utiliser c’est réglé a 100%, mais cela va aider grandement au rendu de vos images.
Présentation de la règle des tiers
La règle des tiers vous invite à considérer vos photos comme découpées en tiers horizontaux et verticaux :
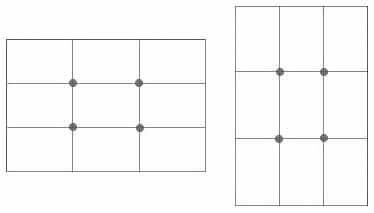 |
| Lignes de force et points forts en paysage et en portrait, format 3:2. |
- Les lignes horizontales et verticales marquent les tiers, on les appelle lignes de force.
- Les points aux intersections sont les points forts.
C’est John Thomas Smith qui le premier a formalisé cette règle, le principe est de laisser un tiers de l’image à un élément, les 2 autres tiers à un autre.
Élément au sens large, le plus souvent on oppose le sujet principal et son environnement, mais cela peut être une opposition de luminosité, de forme, de couleur, …
Exemples d’application
La règle des tiers ne se limite pas à la photo, on la retrouve dans la peinture, le cinéma, la pub,… c’est un principe puissant et très utilisé.
Je vous propose ici d’analyser quelques œuvres connues, pour vous familiariser avec cette règle.
Vous pouvez vous amuser à imaginer les même images mais cadrées plein centre, elles perdraient énormément en expressivité.
Exemples de règle des tiers en peinture
Partant d’une toile blanche, le peintre a tout loisir de composer ses peintures à sa guise, le recours fréquent à la règle des tiers prouve s’il en est besoin ses vertus esthétiques.
|
 |
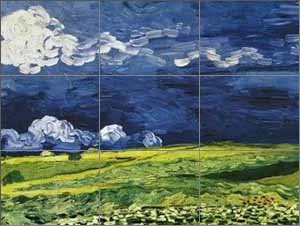
Ce paysage signé Van Gogh est un cas typique d’utilisation de la règle des tiers, on a une opposition :
- De sujet : le ciel sur les 2 tiers du haut, le sol sur le tiers inférieur
- De couleur : bleu contre vert
Ici c’est le ciel qui est mis en avant, avec une place spéciale pour le gros nuage dans le tiers haut-gauche.
|
 |
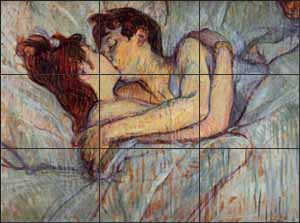
Dans cette peinture de Toulouse Lautrec c’est le sujet (le baiser) qui est mis sur un point fort.
L’environement (le lit) encadre les personnages selon les tiers droit et bas.
On a une double opposition: de sujets et de couleurs.
Exemples de règle des tiers au cinéma
|
 |
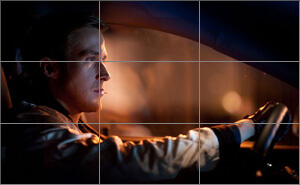
Cet image est extraite de Drive, ici le regard suit la ligne de force du haut, le bras épouse le tiers inférieur, l’oeil est placé sur un point fort.
L’image se lit de gauche à droite, le regard du spectateur suit celui de l’acteur, dirigé vers la route.
|
 |
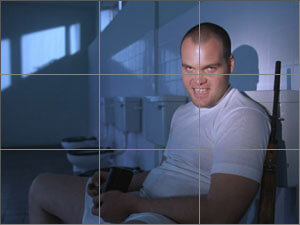
Vous avez le bonjour du soldat Baleine, dans Full Metal Jacket.
Placer le personnage à droite permet de jouer avec la ligne de fuite qui se conclue sur le tiers gauche. Ici aussi le regard est centré sur un point fort.
Il y a également un contraste de luminosité, le tiers de droite étant plus lumineux que les 2 autres tiers.
Exemples de règle des tiers en photo
Vous pouvez regarder les galeries des plus grands photographes, ils n’hésitent pas à exploiter cette règle.
|
 |
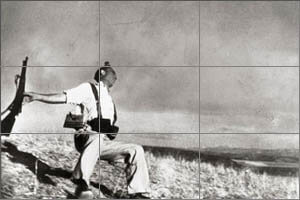
Dans cette célèbre photo Capa a choisi de placer le personnage sur le tiers gauche, la tête (et donc l’impact de balle supposé) sont positionnés sur un point fort.
La partie de droite est vide, nous laissant imaginer la trajectoire de la balle.
Le sol occupe un tiers de la photo, l’importance est donnée au ciel.
|
 |
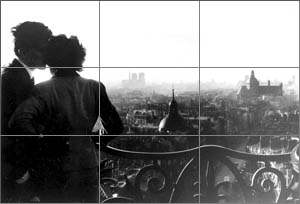
Tout comme pour les protagonistes la ville est offerte à notre regard, en mobilisant les deux tiers droit.
La rambarde se contente du tiers inférieur.
Ici aussi il y a une répartition de la luminosité selon les tiers.
|
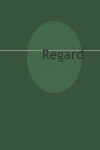 |
Un portrait par Steve McCurry, spécialiste s’il en est.
En mode portrait donc, avec les yeux vers la ligne forte du haut (pas tout à fait SUR la ligne, mais la règle des tiers n’est pas au cm près).
|
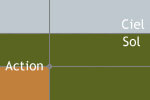 |
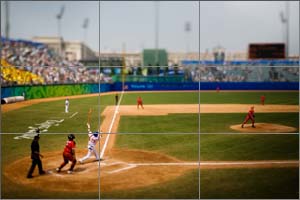
Je termine avec une photo de Burnett, l’action est localisé dans le tiers bas-gauche, le sujet est placé sur un point fort, on a un découpage sol/ciel à 1 tiers / 2 tiers.
A noter l’utilisation d’un objectif à bascule, la zone de netteté est limitée au sujet, ce qui ne gache rien.
Un premier constat : pas la peine d’être géomètre pour utiliser la règle des tiers, elle reste une indication qui peut souffrir d’approximationssans nuire à la photo, n’oubliez pas que c’est l’œil qui décide, pas le cerveau.
Des applications typiques de la règle des tiers
La règle des tiers s’applique naturellement dans des cas très « typés ».
Paysage
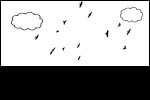 |
L’idée est de placer l’horizon sur un tiers, le tiers inférieur pour mettre en avant le ciel, le tiers supérieur pour mettre en avant la terre.
A noter que de ne pas centrer l’horizon peut vous amener des problèmes de déformation au grand angle, qui exagère les perspectives. |
Portrait
 |
Dans le cas d’un profil choisir de placer le visage sur le tiers gauche donne l’impression que le sujet est penché sur son avenir, sur le passé avec le tiers droit. Tout ça parce-qu’une photo se lit de gauche à droite.
Dans le cas d’une photo en format portrait, typiquement, les yeux sont mis sur le tiers du haut. |
Scène de vie
 |
Très utile si vous voulez mettre en valeur le sujet et son environnement, il faut placer votre sujet sur un tiers voir sur un point fort et profiter des 2 autres tiers pour développer le contexte. |
Sujet en mouvement
 |
Lorsqu’un sujet est en mouvement il est fort appréciable de laisser du champ libre dans la direction du mouvement, dans notre esprit le personnage va s’y déplacer, ceci accentue la dynamique de l’image. Classiquement le sujet occupe un tiers de l’image, l’espace dans la direction de son mouvement occupe les 2 tiers restants. |
La règle dans la pratique
Le photographe expérimenté n’a pas vraiment besoin de repères visuels pour jouer avec les tiers, avec le temps les choses deviennent intuitives.
C’est au débutant que ce paragraphe est dédié.
En premier lieu vous pouvez vérifier si le viseur, ou l’écran, de votre appareil photo propose d’afficher une grille, si oui il est probable qu’il propose une grille en tiers (c’est le cas pour les compacts et les bridges, les reflex n’ont généralement pas ce genre de gadget).
Il vous suffit alors de l’activer et de l’utiliser comme aide au cadrage.
 |
| Affichage d’une grille des tiers à l’écran |
Si vous n’avez pas une telle grille vous pouvez utiliser les collimateurs d’autofocus et/ou la délimitation de la zone d’autofocus.
Pour savoir où se situent les tiers dans votre viseur je vous ai mis à disposition une grille au format 3:2 ou 4:3, affichez la en plein écran et visez avec votre reflex, vous savez maintenant où sont ces fameux tiers.
Voici par exemple la position des lignes de force pour les Canon 650D et Nikon D7000:
 |
| Position des lignes de force par rapport aux collimateurs |
Une des difficultés pour appliquer la règle est de ne pas gêner la mise au point, on peut souhaiter faire la map avec un collimateur en croix qui ne sera pas forcément au niveau du sujet, on peut également choisir de fortement décentrer le sujet, même au-delà de la zone d’autofocus.
Dans ce cas il vous faudra faire le point, bloquer l’autofocus avec le bouton dédié (fonction « AF lock »), recadrer puis finalement déclencher.
 |
| Exemples de boutons de mémorisation de la mise au point |
Si vous avez des questions je vous invites à communiquer avec nous à l’adresse suivante [email protected]
Source: http://www.la-photo-en-faits.com/2013/06/la-regle-des-tiers-en-photographie.html


